Reverse engineering the Hyundai Bluelink and Kia Connect Apps
May 22, 2024
I recently bought a Hyundai Ioniq 6; it’s a fantastic car that I’m enjoying a lot, and I only have a couple of nits with it that I’ve largely gotten over now.
Hyundai/Kia/Genesis (HKG for short) supports connectivity with their newer cars - they essentially have a 4G connection and are able to communicate with the mobile app anytime it has signal. The app allows you to both read vehicle state (e.g. whether the climate control is active, or roll up your windows) and perform actions (lock and unlock your doors, remotely start the vehicle and turn on the climate control, etc). It also gives you optional notifications for alerts such as if you forget to lock your doors.
However, Hyundai doesn’t currently expose any way for you to integrate their vehicle APIs with external systems. I really wanted to get my vehicle data ingested into Home Assistant (HA), so that I could see my car’s battery level, remaining distance-to-empty, along with nearby charging stations, all on my home dashboard.
Prior Art
A quick Google shows that some other folks have already done a lot of the hard work to reverse engineer / sniff the APIs that the app hits. To summarise:
- There are two main implementations: Bluelinky (Node.js) and hyundai_kia_connect_api (Python)
- There is an open-source Home Assistant Community Store (HACS) integration to add Hyundai/Kia vehicle support into HA called kia_uvo, which sits on top of hyundai_kia_connect_api
- There is a Discord community where we coordinate efforts and knowledge
- Every region (US/Canada/Europe/China/Australia) has its own API server. The US and Canada APIs are the same, and the Europe + China + Australia APIs are largely the same with minor regional variations. The US/Canada vs Europe/China/Australia APIs are completely different.
- Hyundai vs Kia vs Genesis have different API servers and tokens/secrets, but the APIs and schemas are the same for a given region.
- Newer HKG cars running ccOS have a different API compared to older vehicles.
- The US has an online web portal that can perform many of the same functions as the mobile app, making it easier to reverse engineer. Other regions only have a mobile app, which is very locked down and may be more difficult to reverse engineer.
Unfortunately, it seems that I was the first one here from Australia, so I would have to do the work and track down all of the endpoints, secrets, etc for the Australia region.
The APIs were largely reverse engineered by performing a man-in-the-middle (MITM) attack on the apps and sniffing the traffic flow. However, because of protections that HKG put in place on the app, achieving this is a bit fiddly. This blog post goes into detail on what’s necessary to do this, and is honestly mostly documentation for myself because I had to do this again after a year and completely forgot how.
Developer environment - Android VM
- It’s easiest to do everything via Windows Subsystem for Android (WSA). Because you’ll need root access and Magisk in an Android environment, don’t install WSA the regular way through the Microsoft Store - you’ll need to find a rooted + Magisk WSA installer online (e.g. https://github.com/LSPosed/MagiskOnWSALocal). This requires administrative access to your computer, so research your own distribution with caution. If you feel uncomfortable with this, you can always run it in a virtual machine, as long as your computer supports nested virtualization. Root will be used to load Frida, which we’ll need later, and Magisk is needed so that we can hide the fact that we’re root from Bluelink (which tries to detect root and then closes the app if it finds out).
- Note: there’s currently a bug where the internet inside the WSA instance doesn’t work. Until that’s fixed, it’s best to use WSA 2306.40000.4.0 or earlier, which doesn’t have the issue.
- Search for
Windows Subsystem for Androidin the Start Menu to open the WSA settings. Go to “Advanced Settings” and enable Developer Mode. - For some reason, adb debugging from WSL -> WSA didn’t want to connect, so to work around this, I just enabled “Local network access” in Advanced Settings as well, and then connected adb via my computer’s LAN address
192.168.1.X:58526instead, effectively just doing a loopback but through my network.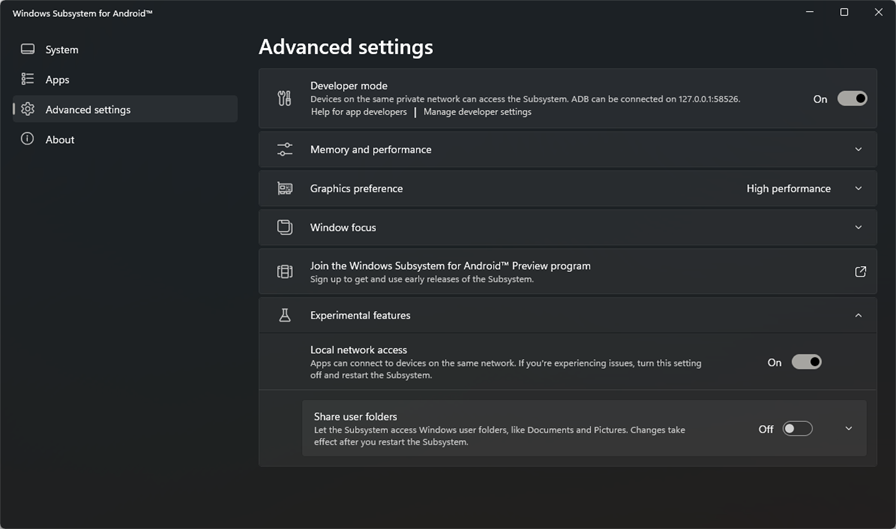
- Boot WSA, either by clicking “Manage developer settings” or by going back to the System tab and clicking the expander on “Files”. Magisk should open and ask to finish installation - allow it to reboot the WSA instance.
- Once rebooted, open Magisk’s settings cog in the top right, scroll down, and enable Zygisk. Reboot again by leaving the settings menu and hitting the reboot button in the top right of Magisk.
- Open Magisk settings again, and enable “Enforce DenyList”. We’ll configure it for our app later.
- Download the latest version of
frida-server-X.Y.Z-android-x86_64from their Github. Push it to your WSA instance, make it executable and run it as superuser:
adb push frida-server-X.Y.Z-android-x86_64 /data/local/tmp/
adb shell
chmod +x /data/local/tmp/frida-server-X.Y.Z-android-x86_64

# This will pop a Magisk prompt, so make sure to accept it
su

# This will "hang" with no output - this is expected.
/data/local/tmp/frida-server-X.Y.Z-android-x86_64
Developer environment - IDE
You can use whatever you want here, but I used VSCode with the APKLab extension (which wraps a collection of Android APK decompilation and deobfuscation tools).
Prepping the app
Unfortunately, the Bluelink app is quite well protected, and has various safeguards that will pop a notification and then close the app after you acknowledge it. These safeguards include preventing:
- Attempting to bypass the SSL pinning / installing a different certificate
- Enabling USB debugging on your device
- Having a rooted device
- Altering the binary in any way
- and more!
So, we’ll need to prepare the app for MITM by removing some of these safeguards. We’ll do this by decompiling the app, flipping a flag (which seems to be a backdoor / escape hatch), enabling debugging, and then recompiling it all again.
- Get “Split APKs Installer” (SAI) off Github or F-droid and install it.
- Open it and make a backup of your Bluelink / Kia Connect app. This should export a .apks file into your selected folder. Move this file to your computer.
- Unzip the .apks file into its constituent .apk files which should consist of a
base.apk, asplit_config.arm64_v8a.apk, and asplit_config.xxhdpi.apk. - Open VSCode and choose “APKLab: Open an APK” and select
base.apk. Enable Java decompilation in the next settings modal, click OK, let it decompile, and then open the resulting directory in VSCode again. This should create a newbasedirectory in the folder where you extracted your apks. - Open
base/java_src/com/apk_shield/C0001skdb.javaand scroll down to the bottom of the file (it should be fairly large, ~22.5k LOC). Hopefully, there should be a ~60LOC function that handles a bunch of notification stuff. At the bottom of that function, there should be a block that looks like so:
        if (pureApp != null && i == 3) {
            if (!f12M.contains("true")) {
                f19f = false;
                return;
            }
            pureApp.m83a();
            m70g();
        } else if (pureApp == null || (i == 2 && !f7H.contains("true"))) {
            pureApp.m74c();
            f19f = false;
        } else {
            pureApp.m83a();
            m70g();
        }
- We’re interested in the first if statement, specifically
!f12M.contains("true"). If you go all the way back up to the top of the file or use a search, you should hopefully be able to see the variable declaration which will look like:
    /* renamed from: M */
    private static String f12M = "true";
- We now know that the variable that we’re after is
M. Openbase/smali/com/apk_shield/skdb.smali. After you skip the first 100 lines or so which are just initialising static fields, you should reach a constructor that then defines a bunch of private variables - this follow the same structure as the Java. Look for a line likesput-object v0, Lcom/apk_shield/skdb;->M:Ljava/lang/String;(note theMvariable name). - Immediately before that line, there should be a
const-string v0, "true"defined. Change"true"to"false". - Right click
apktool.ymlagain, and click “APKLab: Rebuild the APK”. Hopefully this works. If not, deal with any errors (you might need to install various Android build dependencies etc). This should result in abase/dist/base.apkbeing created.
We now need to rebundle all three split apks back together again. Unfortunately, since we have modified the base.apk, the apk signature will have changed and we need it to be the same for all three apks. There’s probably a more focused tool for this, but I’ve just been using android-unpinner. This will enable debugging support for the app, bundle a small amount of certificate unpinning code (this doesn’t really matter since we’ll inject our own via Frida anyway), and re-sign all apks.
- Install android-unpinner using the instructions in their readme.
cdto the root of where you extracted your apks.- Run
android-unpinner patch-apks base/dist/base.apk split_config.xxhdpi.apk split_config.arm64_v8a.apk. This will create*.unpinned.apkversions of all the specified apks. - Run
adb install-multiple -r -d base/dist/base.unpinned.apk split_config.xxhdpi.unpinned.apk split_config.arm64_v8a.unpinned.apkto install it into your WSA instance. This should install Bluelink, and you should be able to see it in your Windows start menu now. - Open Magisk settings again, and then navigate to the “Configure DenyList” menu. Check BlueLink (make sure to also expand it and ensure that any other sub-apps are checked as well).
Prepping the MITM
- Download and install mitmproxy. It’s okay to install this in Windows
directly. Then, open the Start Menu, search for
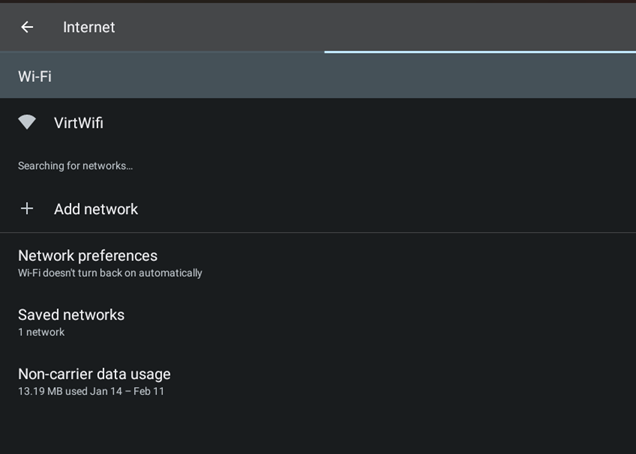
mitmweb, and run it. This should open up a terminal with some logs, and also open a web page where detected traffic will be shown. - Open WSA settings again, go to Advanced Settings, and click on “Manage developer settings”. This should open the Developer Options activity view inside Android.
- Click the search button in the top right, and search for “Wifi”. Select the “VirtWifi” network.
- Click the pencil in the top right, and add a manual proxy configuration. Again, my WSA network was being buggy, so I just used my LAN address for my PC here (e.g. 192.168.1.X, port 8080), but theoretically you could also use the IP address for the WSA network adapter on the Windows side which you can get from
ipconfig.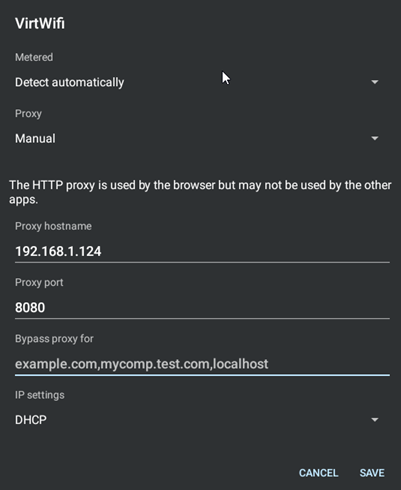
Sniffing the traffic
- Run the app - but not the normal way! We need to start it with Frida and inject some code that will disable as much SSL pinning as possible. The regular anti-SSL-pinning code that APKLab and android-unpinner perform isn’t sufficient. Download this gist as
frida.js. This is a collection of a variety of SSL pinning bypasses that I’ve amalgamated together that seem to work. - Install the latest version of
fridawithpip install frida-tools. - Start the app with
frida -l frida.js -U -f com.hyundai.bluelink.aus. - This should open the Bluelink app, load the splash + login page, and give you a Windows notification saying something like “The app was forged. Please install the app from the valid source”. However, we can now just ignore this notification because of the work we did to prep the app beforehand - the app should not close when this notification comes up.
- Looking at the mitmweb page, we should also see some traffic already coming in. The app will be registering for push notifications, downloading JS chunks, and acquiring any tokens and stamps it needs.
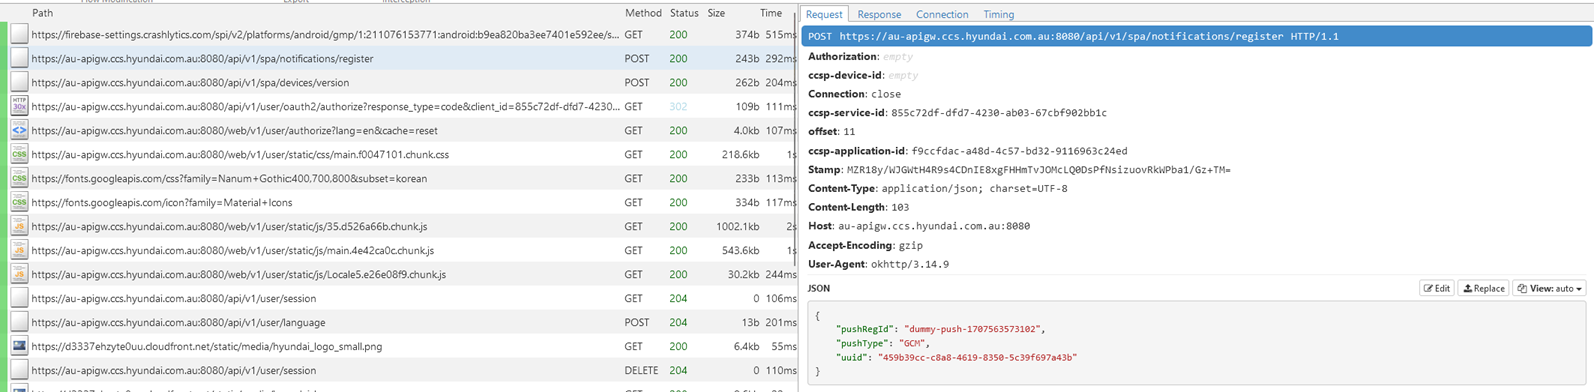
- Login to the app. This should fire off a whole series of requests, performing authentication etc.
Now that the app has been successfully MITM’d and traffic can be sniffed, the API endpoints can be reverse engineered without too much more effort.
The next post will look at the login flow, stamp generation, and a summary of the APIs.